A 3D printed phone stand in five shapes and five patterns, with a third of the plastic
27 September 2026
Until this week the phone and tablet stand generator made one thing: a solid wedge. You typed your phone's thickness with the case on, picked an angle, and got a block that held the phone well and printed without support. For a phone 11 mm thick at 62 degrees, 78 mm wide, that block is 188 g of PLA if you print it solid. It worked. It also looked like a doorstop.
Now the same numbers can go into five shapes, and the default one weighs 68 g.
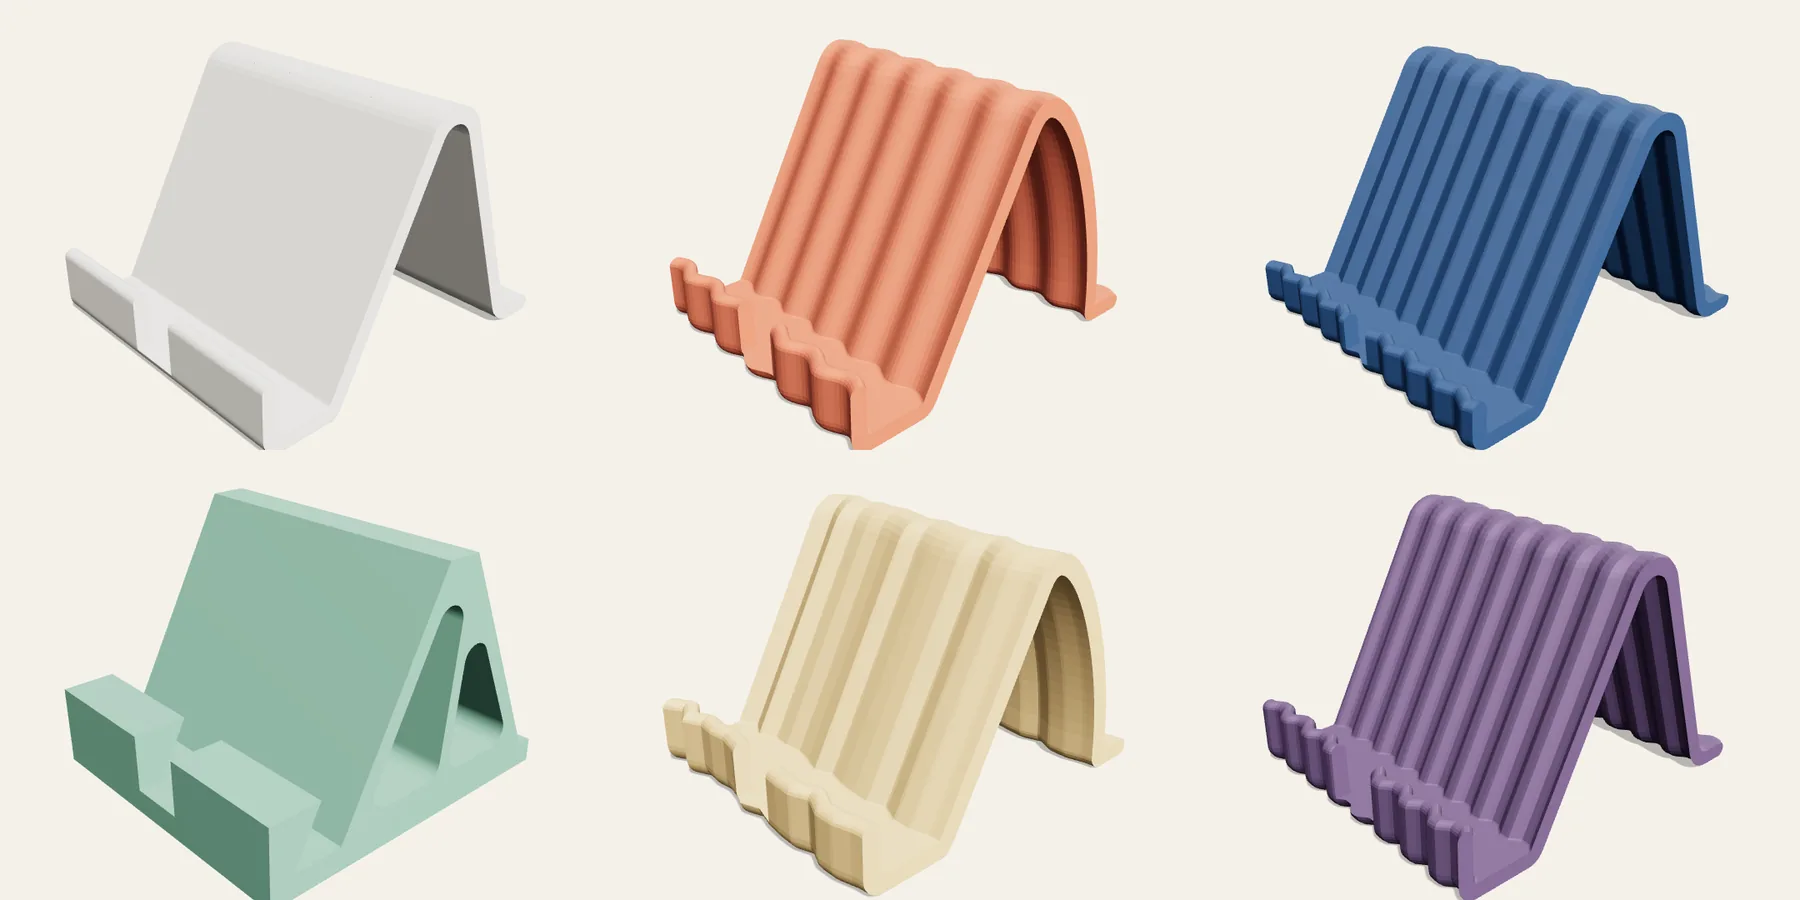
Four shapes, one cradle
Every stand is still a side profile pushed across the width, so it prints lying on that profile. What changed is the profile.
- Ribbon is one band, 4 mm thick by default, folded four times: up into the front lip, along the floor under the phone, up the leaning support, down a back leg and out into a foot. 68 g for the phone above.
- Arch is the same band, but the support keeps going over the top and comes down behind in one curve. 69 g.
- Frame keeps the wedge and opens it into triangular windows between ribs that fan out from the top corner. 154 g.
- Solid is the old block. Old links still open as the block, because they were made with it.
The band is springy, which is the point, so it wants to be printed solid or with at least four walls. A 4 mm band with two walls and 15% infill is mostly air in the middle.
The part that has to be exact is the gap the phone sits in. A slab leaning at an angle needs its thickness divided by the sine of that angle along the floor, so 11 mm plus 0.6 mm of slack at 62 degrees is a 13.1 mm opening. The band styles add 1 mm on top, because the rounded corners at the bottom of the lip and the support eat into the floor.
The fifth shape: a ledge for charging
Every stand used to have a notch cut through the front lip for the charging cable, the old block included. It did not help much. The phone stood on the floor of the cradle and the cradle stood on the desk, so the plug had nowhere to go. The notch is gone from the four standing shapes, and charging got a shape of its own.
Ledge is one band like the ribbon, bent another way. The phone rests in a small trough at the front: a lip, a floor as wide as the cradle opening and the support rising behind it at your angle. From the top of the support a leg runs down and back at 72 degrees to a base that reaches forward under the trough. Nothing touches the trough from below. For the phone at the top of this post, with the ledge at the default 40 mm, the trough floats 32 mm above the base.
A 14 mm slot runs through the floor and the lip in the middle, open to the front. You slide the cable in from the front, plug the phone in and set it down, and the plug hangs under the trough.
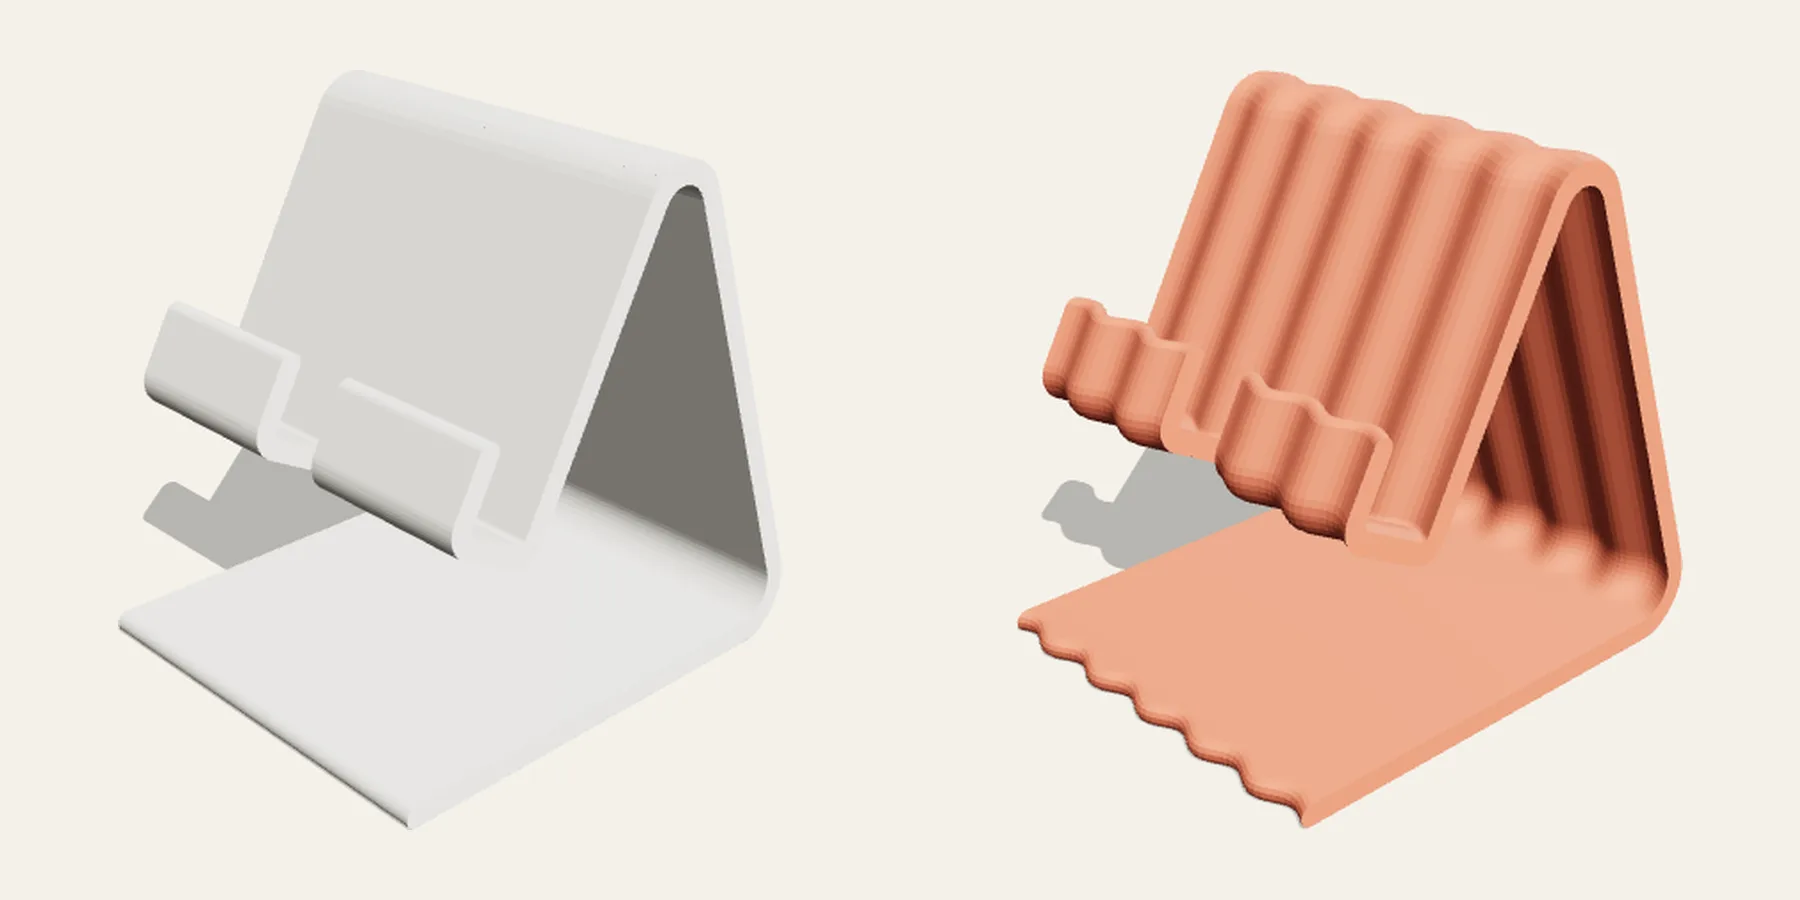
The ledge height, the lip, the band, the slot width, the angle and the support are all settings. Two of them are checked. The lip has to be at least 3 mm, or the phone slides off. The trough has to clear the base by 8 mm, and under 25 mm the generator warns that a straight plug with its cable bend will be tight and an angled cable fits better. The base and the drop down to it cost plastic: 106 g for this phone, against 68 g for the ribbon. It takes the patterns too, like the orange one above.
Patterns that still print without support
The second new setting ripples the whole stand across its width: waves, zigzag, ridges or facets. Facets are the uneven one, straight runs between points that look random but come out the same every time for the same settings.
Every pattern works the same way. The stand is cut into thin slices across the width, and each slice is shifted forwards or backwards along the depth. The base stays flat on the desk, because nothing moves up or down. The lip and the support move together, so the opening does not change from slice to slice.
Printed on its side, the width is the height of the print, so a shift from one slice to the next is an overhang. The rule is 45 degrees at most, and each pattern has its own limit from its shape. At a 12 mm pitch, waves may go 3.8 mm deep, zigzag and facets 6 mm, ridges 3 mm. Ask for more and the generator says which number to change.
One consequence I only saw once the first rippled stand was on screen: a phone is flat, and the cradle is now a slightly different place in every slice. The phone only fits where all the slices overlap. So the opening grows by the pattern's depth, and the phone rests on the crests.
What went wrong on the way
The first ribbon came out 48.7 mm tall for a support I had asked to be 55 mm. Rounding the sharp top corner cut off about 8 mm of the support, and the phone was leaning on less than it should. The corner is now pushed up by exactly the length the rounding eats, and the phone gets the full 55 mm.
The first frame saved 9 g out of 188. The windows were narrow slots between thick ribs, and a slicer would have filled most of what I cut away. Fewer ribs, thinner ones and larger windows brought it to 154 g.
Then I tried the biggest stand the form allows: a frame 1000 mm wide with facets every 4 mm. It came to 16.7 million triangles and took 9.8 GB of memory on my own machine before it finished. The generator on the server gets 700 MB. The patterned stands now have a budget of 250,000 triangles, and anything past it gets a message with the smallest pitch that fits, 42 mm for that frame, instead of a crash halfway through.
The stands in the model library are remade with the new shapes: ribbons and arches for phones, tablets, an e-reader and a handheld console, most of them with a pattern, one frame for a heavy tablet and seven charging ledges. Each one opens in the generator with its numbers filled in.